
To adjust the email quota from cPanel, you can follow these steps:
- Log in to your intoHOST Dashboard.
- Once logged in, navigate to the “Email” section in cPanel.
![]()
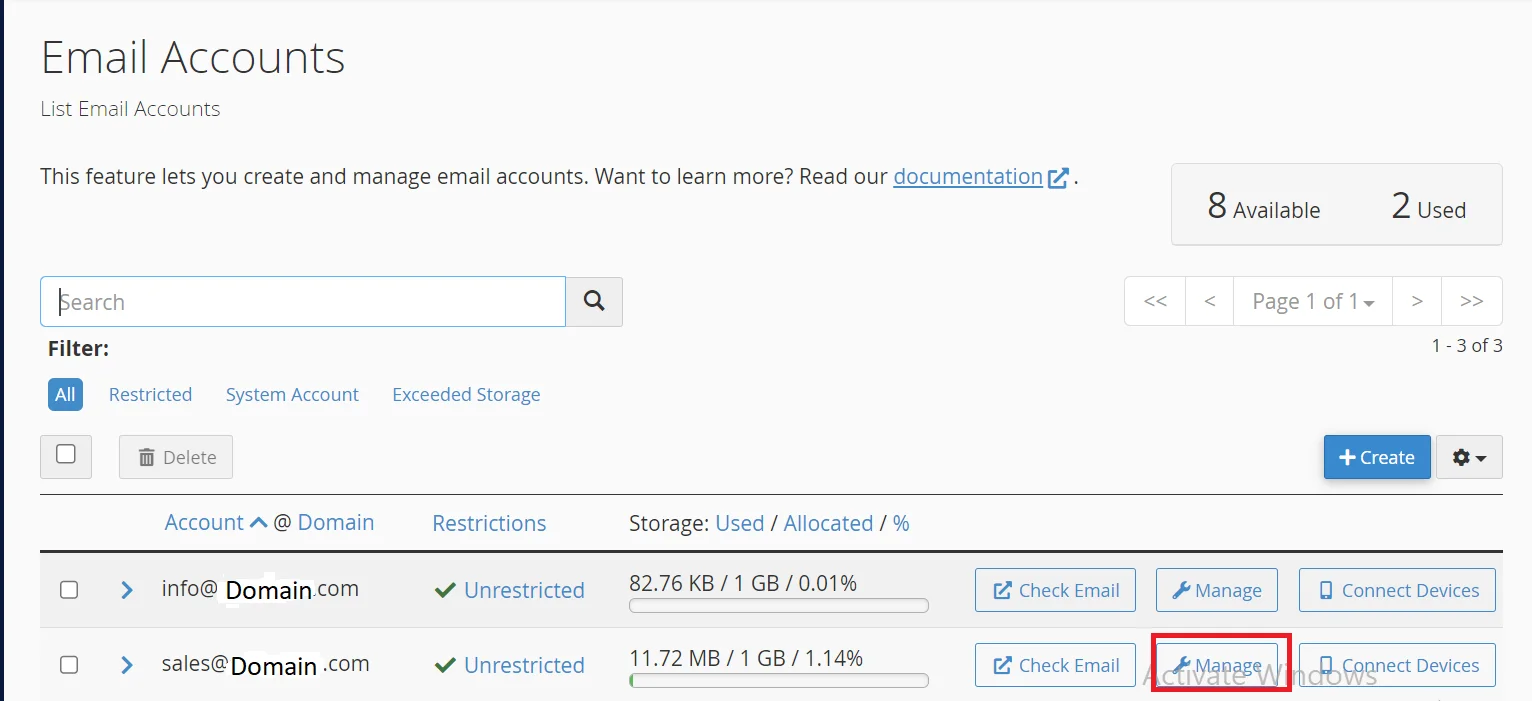
3. In the email section, you should see an option called “Email Accounts”. Click on that option to manage your email accounts.
4. Locate the email account for which you want to adjust the quota and click on the “Manage” or “Change Quota” link next to it.
5. In the quota settings, you can set the storage limit for the email account. This limit determines how much disk space the account can store emails.
6. Adjust the quota value according to your requirements. You can set it to a specific value (e.g., 500 MB) or choose an unlimited option if available. Keep in mind the overall disk space limit allocated to your hosting account.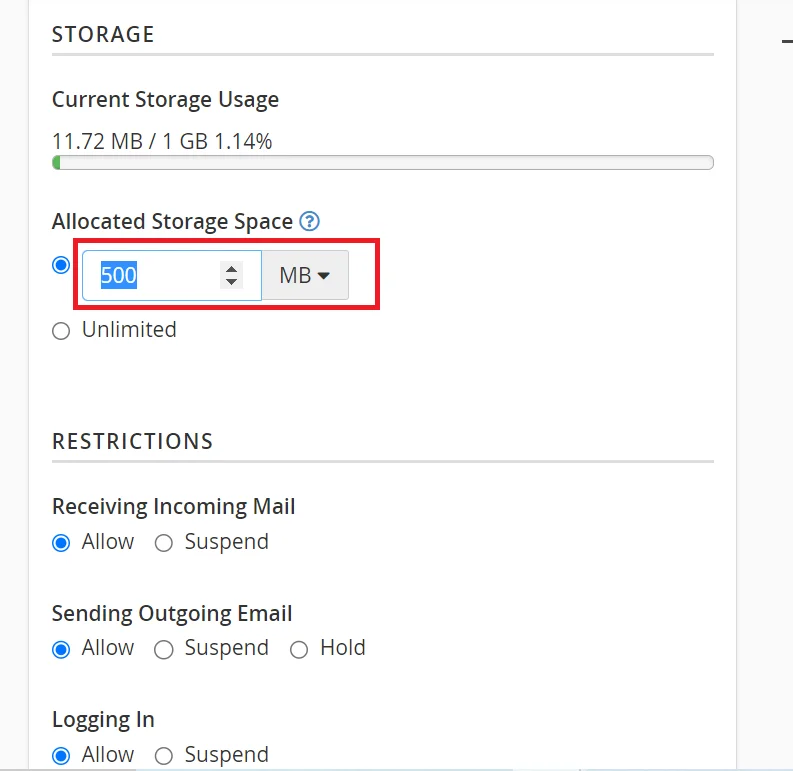 Once you’ve
7. set the desired quota, click on the “Save” or “Update” button to apply the changes.
That’s it! The email quota for the specified account should now be adjusted according to your settings. Repeat the above steps for any other email accounts you want to modify. Remember that the available options and interface may differ slightly depending on your hosting provider and cPanel version.