
Whether you're on a business trip or vacation or just need to acknowledge emails after hours, setting up an automatic reply in your cPanel email is an excellent way to ensure your contacts get a quick response. This guide will lead you through the simple steps to enable an automatic reply for your cPanel email, guaranteeing smooth and professional communication.
Step 1: Accessing cPanel Email Settings
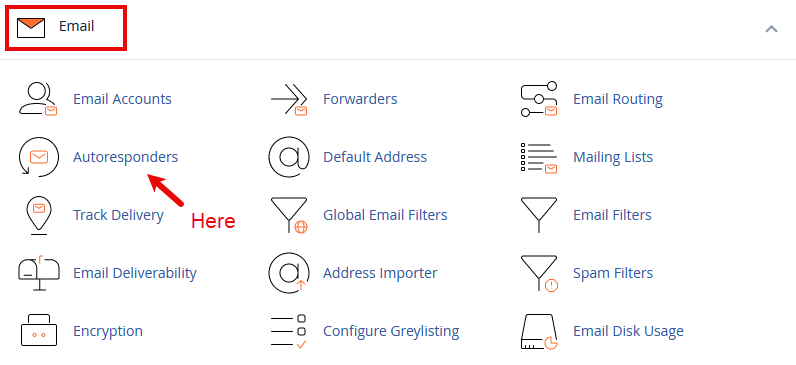
First, you need to log into your cPanel account. You can do this by visiting https://intohost.com/ and entering your credentials. Once logged in, navigate to the "Email" section and click on the "Autoresponders" option. This will take you to the autoresponders page, where you can manage automatic replies for your email accounts.
Step 2: Creating a New Autoresponder
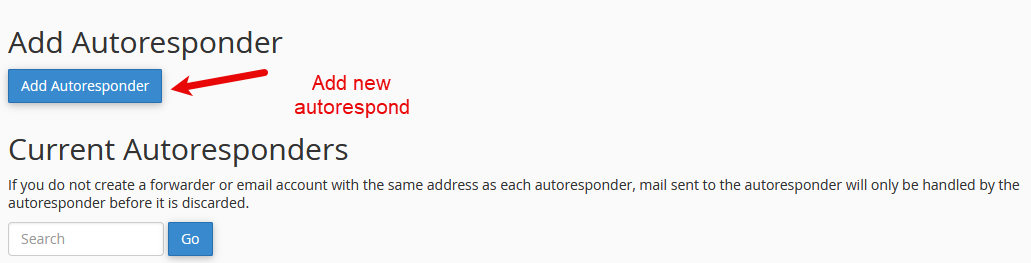
Once in the Autoresponders section, click the "Add Autoresponder" button. Here, you'll be prompted to configure the settings for your automatic reply.
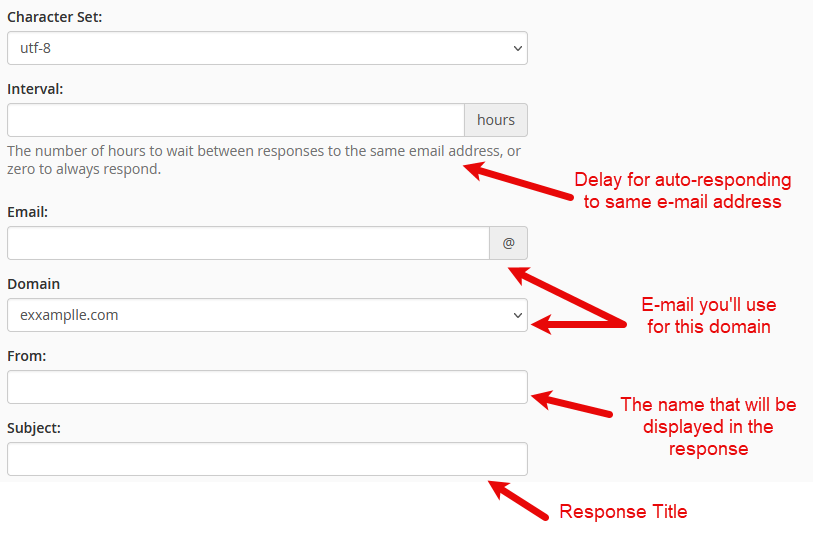
- Character Set: It's typically best to leave this as default (
utf-8), ensuring that your message can be read universally. - Interval: Specify the time in hours between responses to the same email address to avoid sending multiple replies to a single sender.
- Email: Select the email account you want to set the auto-reply.
- From: Enter the name you want the reply to appear from.
- Subject: Write a concise subject line for your auto-reply message.
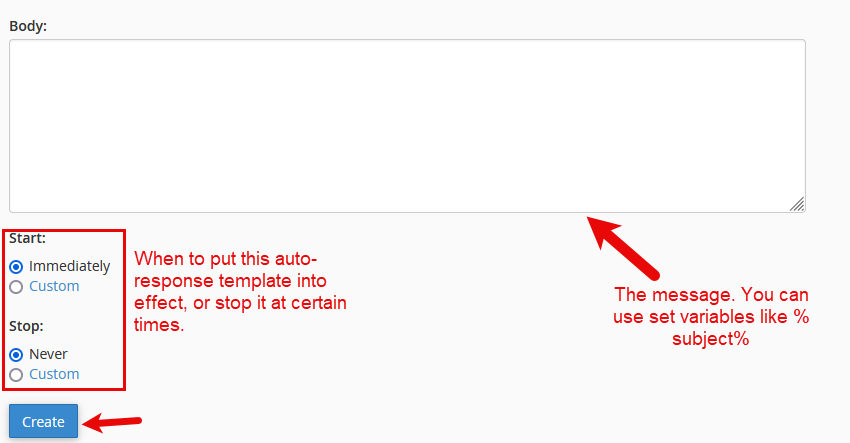
- Body: Draft the message that recipients will receive. This should be professional and informative.
 Success! Remember to include essential information in your auto-reply, such as the duration of your absence and alternative contact information, if necessary. You can also plug our professional email service for enhanced email solutions. For more details, visit our email hosting page.
Step 3: Activating Your Autoresponder
cPanel Autorespond ConfigurationYou have the option to specify when the autoresponder starts and ends. This is particularly useful for planned absences. If you're setting up a permanent or indefinite auto-reply, you can leave the end date unspecified.
You have the option to specify when the autoresponder starts and ends. This is particularly useful for planned absences. If you're setting up a permanent or indefinite auto-reply, you can leave the end date unspecified.
After filling in all the details, click the "Create/Modify" button to activate your automatic reply. A confirmation message will appear, indicating that your autoresponder is now set up and will respond to incoming emails as specified.
Conclusion
Setting up an automatic email reply in cPanel is a simple process that can significantly boost your email communication strategy. It ensures your contacts receive timely responses, maintaining engagement and professionalism even when you're away.
If you face any challenges while configuring your automatic reply, please submit a support ticket here or start a LiveChat session using the icon at the bottom right of the screen. Our support team is always available to help with any questions or concerns.