
Email applications like Outlook are invaluable tools for managing multiple email addresses efficiently. They eliminate the need for constant sign-ins across various platforms, streamlining communication. This article will guide you through setting up your cPanel email account in Outlook for versions 2016, 2019, 2021, and Outlook 365.
Prerequisites
Before you begin, ensure you have the following:
- Your email account details
- Access to your cPanel via the WHMCS client area
- Outlook 2016, 2019, 2021, or Outlook 365 installed on your computer
Step-by-Step Guide
1. Access Your cPanel Account
- Log in to the WHMCS client area at https://intohost.com/.
- Once logged in, navigate to Services > My Services.
- Find your hosting account and click the "Login to cPanel" button. This will redirect you to your cPanel dashboard without entering cPanel login credentials.
2. Obtain Email Configuration Settings
- In cPanel, scroll down to the Email section and click "Email Accounts."
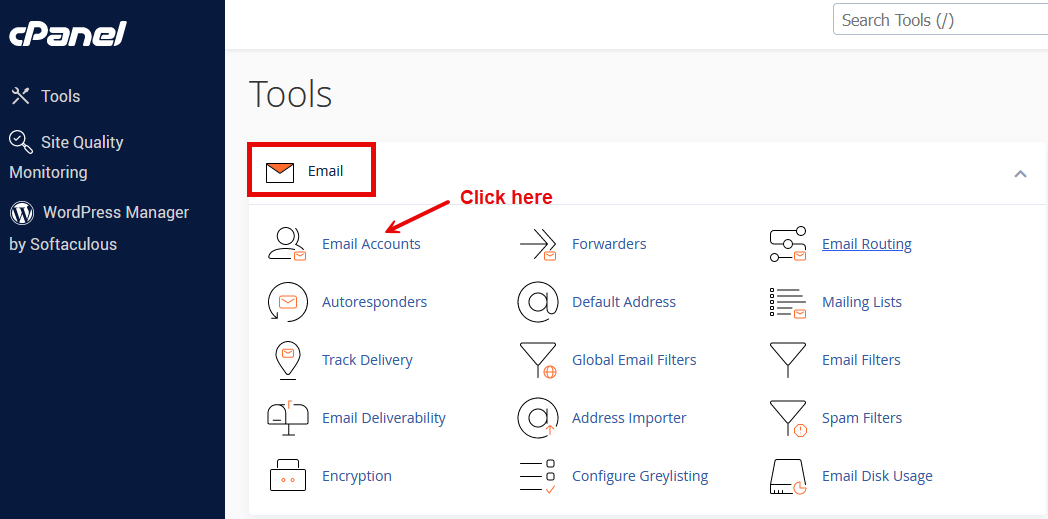
- Find the email account you want to set up in Outlook and select "Connect Devices."
- Note down the IMAP and SMTP settings, including server names, ports, and encryption methods.
3. Setting Up Your Email Account in Outlook
If you're opening Outlook or Outlook for Microsoft 365 for the first time, you might encounter the "Choose Profile" window. You can enter 'Outlook' as your profile name and click OK to continue, then click Next on the "Welcome to Outlook" window. This step is your gateway to adding your email accounts to Outlook.
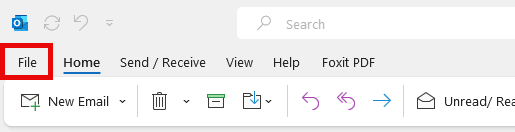
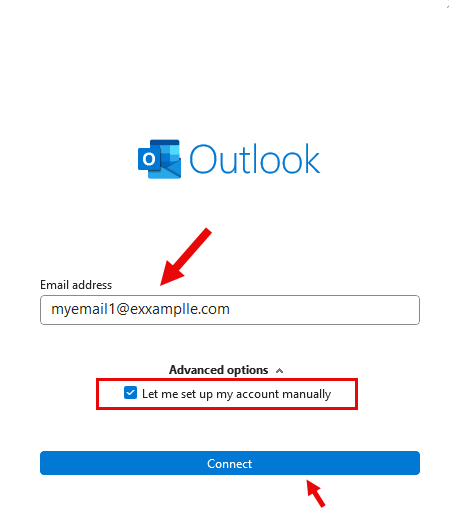
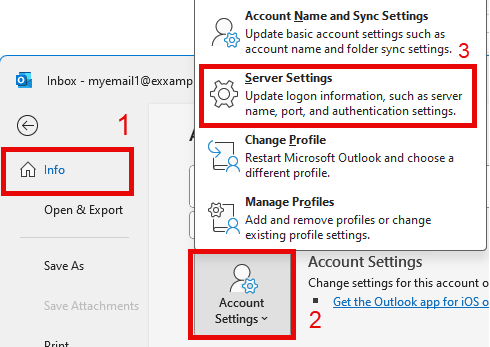
- In Outlook, select File > Add Account. If it's your first account setup, try using the 'Connect' option with your email ID and password for an automatic setup. If auto set up does not work, select "Manual setup or additional server types".

- Choose "Manual setup or additional server types" and click Next.
- Select "POP or IMAP" and proceed by clicking Next.

- IMAP is recommended over POP3 for its ability to synchronize emails across all devices, reflecting any actions (read/delete/reply) both on the server and your mail application.
- Fill in the required fields using the information obtained from cPanel:
- Your Name: The name that will appear in your outgoing emails.
- Email Address: Your full email address.
- Account Type: IMAP (recommended) or POP3.
- Incoming mail server: (IMAP information from cPanel)
- Outgoing mail server (SMTP): (SMTP information from cPanel)
- Username: Your full email address.
- Password: Your email account password.
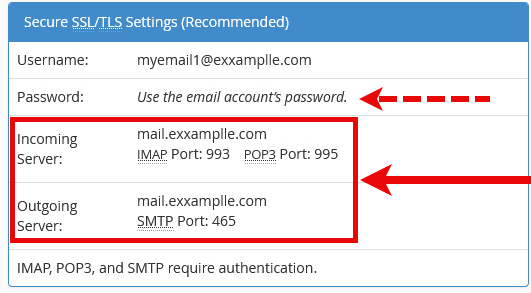
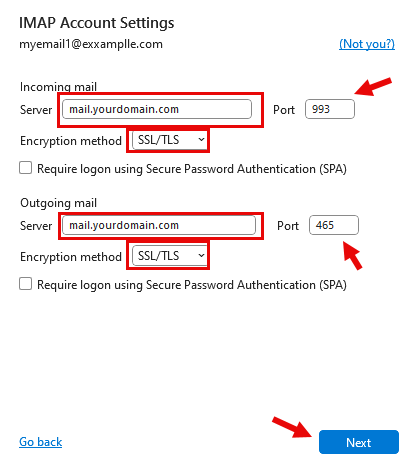
Info! Recommended Secure SSL/TLS Settings:
- Username: [email protected]
- Password: Use the email account’s password
- Incoming Server: mail.yourdomain.com
- IMAP Port: 993 - POP3 Port: 995
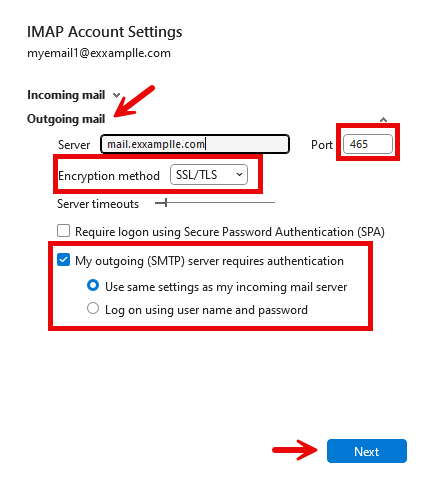
- Outgoing Server: mail.yourdomain.com
- SMTP Port: 465
- Click on More Settings > Outgoing Server tab and check "My outgoing server (SMTP) requires authentication."
- Go to the Advanced tab. Enter the IMAP and SMTP port numbers you noted earlier. Select the correct encryption method (SSL/TLS or STARTTLS, as recommended in cPanel).
Click OK > Next. Outlook will now test your settings. If everything is correct, you'll see a success message.
4. Finalizing Setup and Testing
- After completing the setup, test the account by sending an email to and from it, preferably to a Gmail or similar account, to ensure proper configuration.
5. Configuration Tips
- Use IMAP: IMAP syncs your email across all devices, ensuring your messages are updated everywhere.
- Secure Your Connection: Always opt for SSL/TLS encryption for incoming and outgoing servers to protect your email data.
Common Errors and Troubleshooting
-
Connectivity Issues: Verify your DNS settings if you're using services like Cloudflare and ensure they're pointed correctly to support email functionality.
-
Performance and Synchronization Errors: Large mailbox sizes or outdated hardware can affect Outlook's performance, while configuration errors can lead to synchronization issues.
-
Authentication and Connectivity Problems: These can arise from incorrect password entry, changes in authentication requirements, or incorrect server settings. Ensure all details are up to date and correct.
-
Profile Setup Issues: Automatic detection of email server settings might fail, especially with non-standard ports or security protocols. Manual setup is recommended in these cases.
- Port Blocked: Ensure your network allows traffic on the IMAP and SMTP ports provided by cPanel. Firewalls or ISPs may block these ports for security reasons.
- SSL Issues: If you encounter SSL warnings, verify that you've chosen the correct encryption method and port numbers per your cPanel settings. Incorrect settings can lead to security warnings or failed connections.
For users seeking a more robust email solution, consider exploring our professional email services at https://intohost.com/email-hosting.
By following these detailed steps, you should be able to set up your cPanel email account in Outlook seamlessly. Managing your emails through Outlook simplifies your workflow and enhances your productivity by keeping all your communication in one accessible place.